
In one sentence
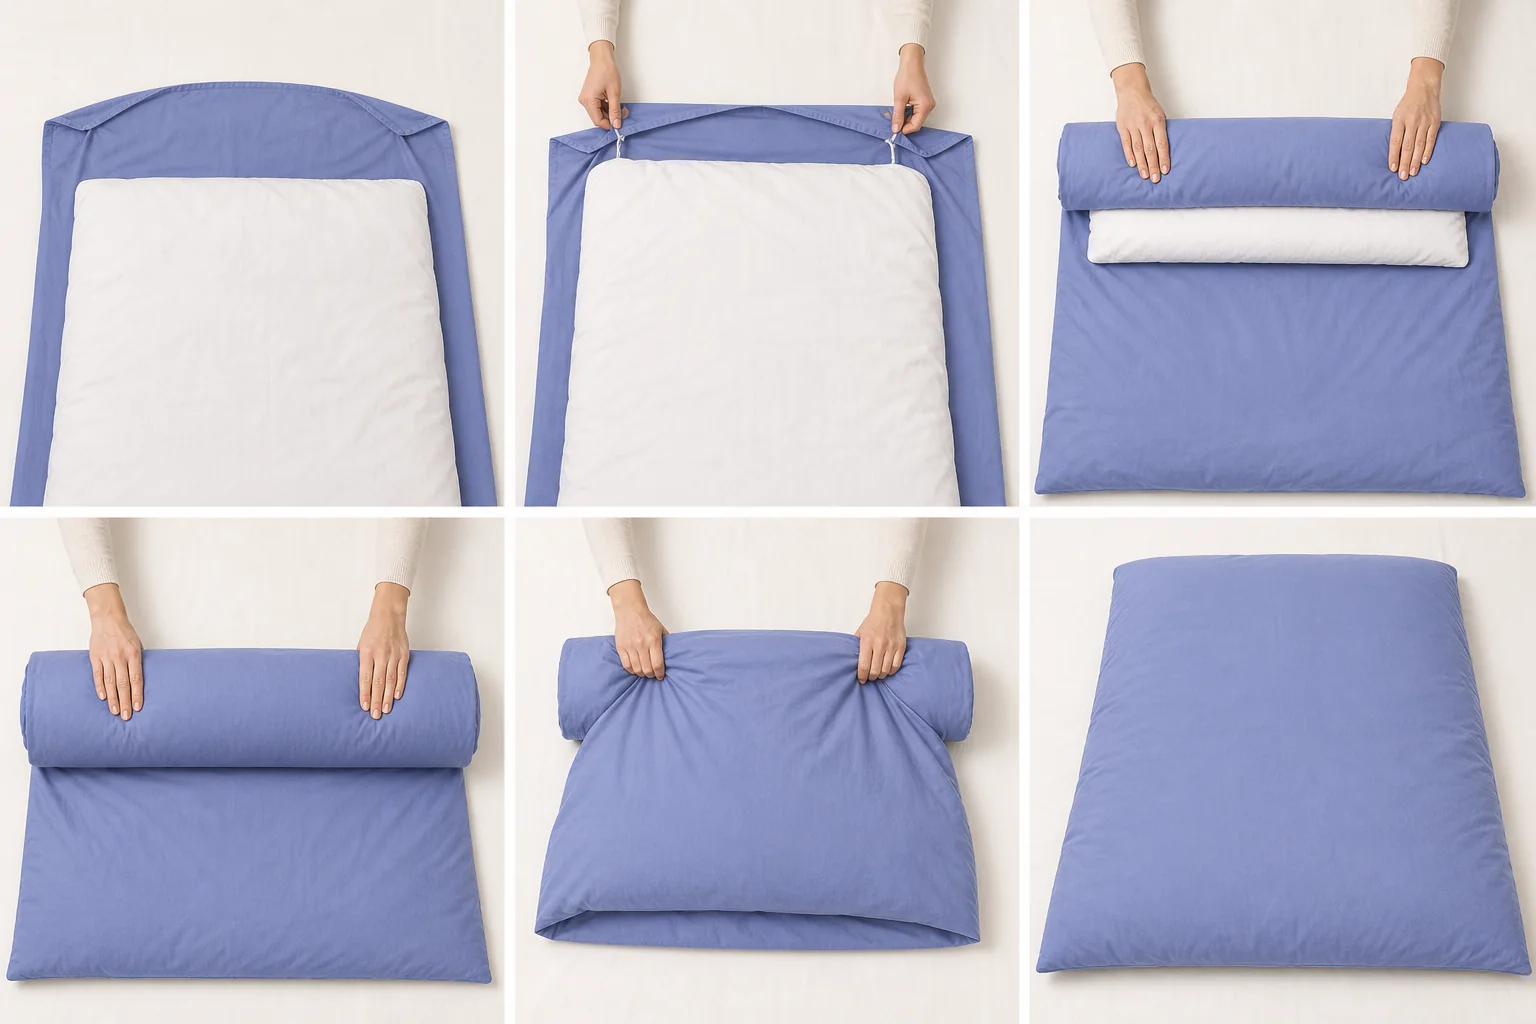
Turn the cover inside out, match each tie with the corresponding insert loop, use a secure removable bow or double knot without pulling tight, fit the cover, then close the foot opening. Use all available matched points and inspect them at every change.
Attachment-point troubleshooting
| Situation | Best response | Avoid |
|---|---|---|
| Four ties and four loops | Match corner to corner | Cross ties diagonally |
| Eight points on both layers | Use corners and matching midpoints | Skip sides on a large insert |
| Cover ties; insert no loops | Add reinforced soft loops if permitted | Tie around a filled corner |
| Insert loops; cover no ties | Sew soft ties into sound cover seams | Safety pins or sharp clips |
| Tie repeatedly tears out | Repair seam and check fit | Make the knot tighter |
When ties help—and when they cannot
They help with normal movement
Matched dimensions and intact soft anchors reduce corner migration during sleep and cover changes.
They cannot correct poor fit
A larger cover leaves empty fabric, while a small cover compresses the insert even with eight anchors.
The tie and loop are two halves of one system
The cover usually carries two soft ribbons at an inside corner; the insert carries a fabric loop at the matching point. Threading the tie through it keeps surfaces aligned while remaining removable.
Names vary—corner tabs, anchor loops, duvet ties or tabs—so photos and number of points are more useful than terminology.
Use a secure knot without cinching the seam
A bow is quick to remove; a loose square-style double knot resists untying. Whichever you use, leave enough ease for fabrics to lie naturally.
Over-tightening concentrates sleep and laundry forces at a tiny seam. The knot prevents separation; it should not gather the corner into a hard lump.
Four points are common; more can stabilize large covers
Four reinforced corners address major movement. Mid-side points can reduce edge drift on Queen and King systems when both layers provide matching anchors.
Never connect a midpoint to a corner merely to use every tie. Crossed tension twists the insert and can worsen bunching.
Add missing anchors only to sound, reinforced fabric
A competent sewer can add soft washable tape into an existing strong seam. Match material and care temperature, reinforce the load and keep stitches away from fill leakage paths.
Do not tie around the insert corner, pierce it with safety pins or use hard clips that can open, snag or create pressure points.
Measure before adding more hardware
Persistent empty corners often mean dimensions differ or one piece is rotated. Correct orientation and compare finished width and length before blaming anchors.
The shifting guide owns the complete diagnosis; this page explains attachment technique and repair.
Untie and inspect at every cover wash
Separate insert from cover and follow each label. Ties can tangle around buttons, zipper pulls or other laundry, so secure them as directed.
Replace frayed ribbon and repair pulled stitching before reuse. A failed anchor during laundering can enlarge into a shell tear.
How to tie an insert into its cover
- 01Turn the empty cover inside out and spread it with the closed edge at the head.
- 02Lay the insert on top in the same orientation and match every corner and midpoint.
- 03Pass each soft tie through its corresponding reinforced loop; never wrap around fill.
- 04Secure a removable bow or compact double knot with slight slack so the seam lies flat.
- 05Fit the cover, close the opening and shake gently from the top corners.
- 06At each wash, untie rather than cut, then inspect fraying and stretched loops.
Frequently asked questions
What are the loops on a duvet cover for?
Loops are usually on the insert and receive soft ties from inside the cover. Together they keep corresponding corners or edges aligned.
Source: The Company Store cover fitting guide, Sleep Foundation duvet-cover method, FTC care-label guidance
What do you do with the ties on a duvet cover?
Pass each tie through the matching insert loop and make a secure removable knot without cinching. Then fit and close the cover.
Source: The Company Store cover fitting guide, Sleep Foundation duvet-cover method, FTC care-label guidance
How do you tie a duvet cover with loops?
Work corner to matching corner, use all corresponding points, leave slight slack and avoid wrapping ties around the filled shell.
Source: The Company Store cover fitting guide, Sleep Foundation duvet-cover method, FTC care-label guidance
Should duvet covers have ties?
Ties are useful but not mandatory. Correct dimensions still matter, and some systems use snaps or other soft anchors.
Source: The Company Store cover fitting guide, Sleep Foundation duvet-cover method, FTC care-label guidance
Sources and editorial method
We checked definitions and practical distinctions against the sources below. Product recommendations live in separate buying guides with their own criteria and disclosures.
The bottom line
Match point to point, knot securely but gently and let measured fit do most of the work. More tension cannot compensate for mismatched dimensions or weak seams.